Increasing in Knitting
There are three main methods of increasing stitches, all of which are quite simple to do. The first is to make a stitch (M1) by picking up a loop between two stitches and knitting into the back of it. This forms a neat, invisible increase, so is often used in the middle of a row or where a series of increases are to be worked. The second is to work into the front and back of a stitch (inc 1 or inc in next st). This method is normally used at the beginning and end of a row, for instance on sleeve shapings.
The third method is to make a yarn forward increase (yf) which, when completed, leaves a visible hole and is often used in lacy patterns.
Don’t confuse the ‘M1’ and ‘inc’ methods of increasing. For example, after the rib has been worked, instructions are often given in the next row to increase stitches across the row by the ‘make one’ (M1) method. This does not use up a stitch but if you increase by knitting into the front and back of a stitch each time your instructions will not work out correctly and you will run out of stitches before completing all the increases required.
Make 1 (M1)
Lift the yarn lying between the stitch just worked and the next stitch and place it on the left hand needle, then knit (or purl) into the back of this loop (Fig.49).
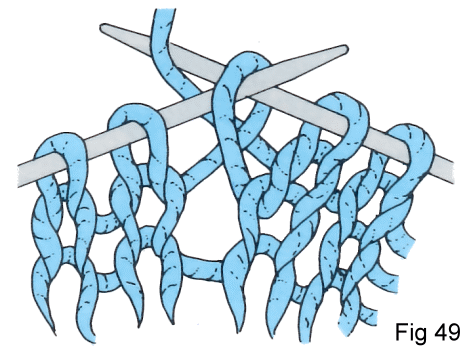
To make two stitches (M2) work as for M1 but knit into the back and then the front of the loop.
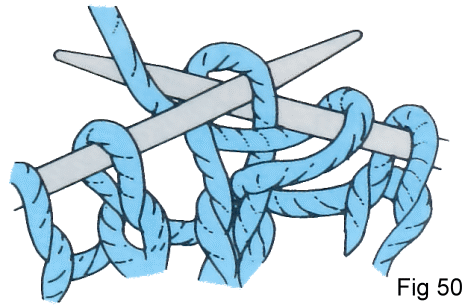
Working into the front and back of a stitch (inc 1 or inc in next st)
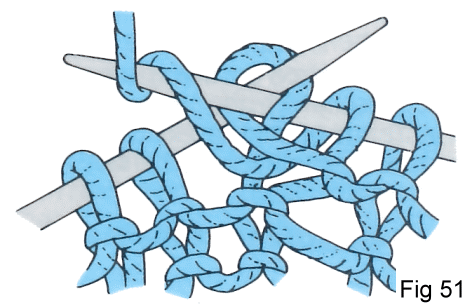
On a knit row, knit first into the front of the stitch normally, then, before slipping it off the needle, knit again into the back of the same stitch (Fig.50), and slip the stitch off. The same method is applied to a purl row, in this case you purl into the front then the back of the stitch (Fig.51).
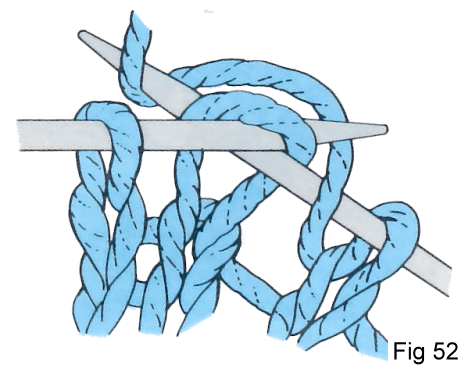
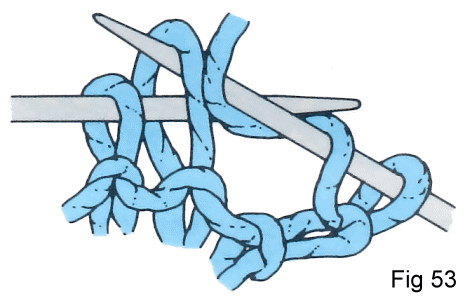
Yarn forward increase
On a knit row (yf), knit a stitch, bring the yarn to the front, take it over the right hand needle and knit the next stitch (Fig.52). On a purl row (yrn), take the yarn over the right hand needle to the back of the work, then under the needle to the front (Fig.53).
Sometimes the abbreviation ‘yo’ (yarn over) is used as a general term on knit or purl rows to indicate that a stitch has to be increased by winding the yarn round the needle, as opposed to the ‘front and back’ method described above in Figs 49 and 50. In this case, ensure that you wind the yarn correctly. After you have worked the next stitch, check that you have actually made an extra stitch and not just carried the yarn from front to back or vice versa!
All content provided by TB Ramsden & Co.