Joining
Grafting: This is an excellent way of invisibly joining two pieces of knitting. The edges are not cast off and the knitting can be joined either while it is still on the needles or after it has been taken off.
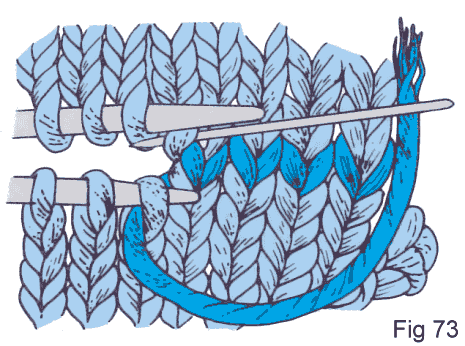
Grafting with knitting on the needles: Thread a wool or tapestry needle with a length of knitting yarn. Place the two pieces to be joined with right sides facing and hold the knitting needles in the left hand.
* Pass the wool needle knitwise through the first stitch on the front needle and slip the stitch off the knitting needle. Pass the wool needle purlwise through the second stitch on the same needle, leaving the stitch on the needle. Pass purlwise through the first stitch on the back knitting needle and slip the stitch off, then pass knitwise through the second stitch on the same needle, leaving the stitch on the needle. Repeat from *.
Pull the yarn through so as to form stitches of the same size as the knitted ones (Fig.73). To finish, darn in the loose ends at the back of the work.
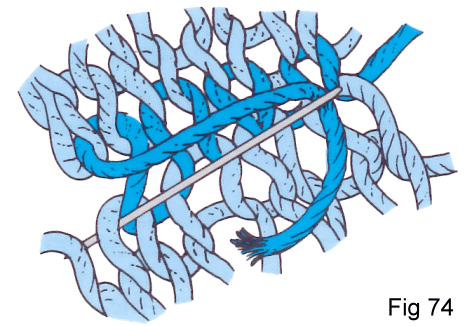
Grafting with knitting off the needles: Carefully lay the pieces to be joined close together, with the stitches on each side corresponding to those opposite. Thread a wool or tapestry needle with the knitting yarn. Beginning on the right hand side, bring the needle up through the first stitch of the upper piece, bring it down through the first stitch of the lower piece and bring it up again through the next stitch to the left. * On the upper piece, pass the needle down through the same stitch it came up through before and bring it up through the next stitch to the left. On the lower piece, take the needle down through the stitch it came up through before and bring it up through the next stitch on the left. Repeat from * (Fig.74).
Backstitch seaming
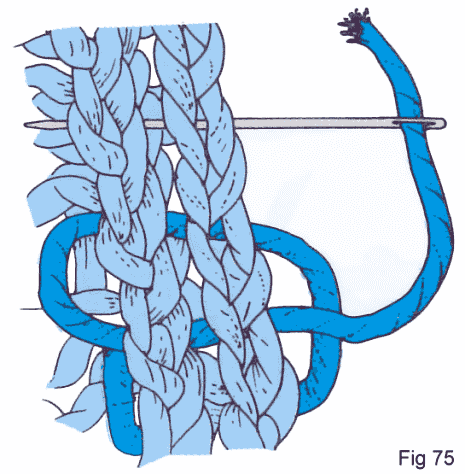
Most garments can be made up with a backstitch seam, which gives a neat finish if done carefully. Use the same yarn, splitting strands of thicker yarns if necessary and remember to keep twisting the yarn as you sew if it tends to unwind (Fig.75).
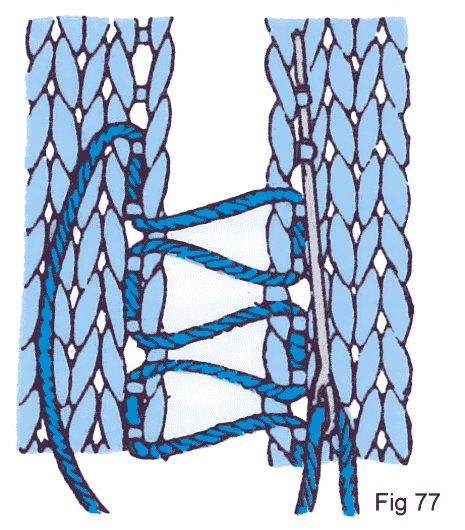
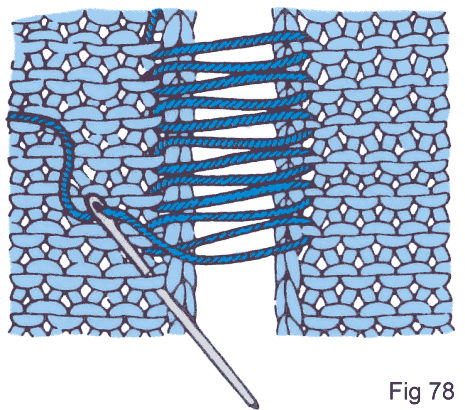
Invisible seaming - mattress stitch
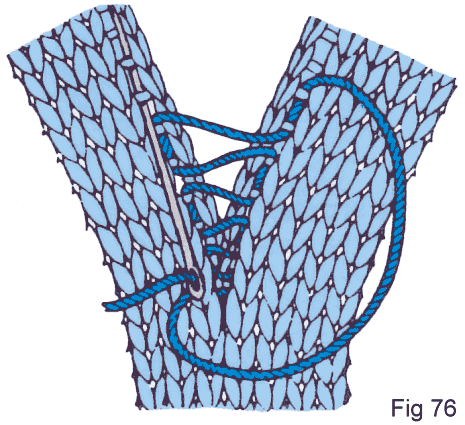
This joining method gives the neatest and most professional finish to a garment. Mattress stitch can be worked either one stitch in from the edge (Fig.76) or half a stitch in from the edge (Fig.77), depending on how neat the edge of the fabric is and how thick the yarn is. Where the knit side of the work is the right side, work under two rows at a time as shown in Figs 76 and 77. Where purl is used as the right side, it is better to work under only one row at a time (Fig.78) though experience will soon tell you which method to use. The secret of good mattress stitching is to keep the seam elastic without letting it stretch too much. The best way to do this is to work the mattress stitch loosely for one or two cms, then pull the thread very firmly so that the stitches are held together quite tightly. Now stretch this seam slightly to give the required amount of elasticity, and then continue with the next section of the seam. If you are accustomed to sewing your knitting together by other methods, it may take a little while to get used to mattress stitch, but practise makes perfect and the professional finish it gives makes it worthwhile.
One advantage of mattress stitch is that it can be used to sew shaped edges together quite easily. Because you are working on the right side of the work all the time, it is much easier to see where you are and to keep the seam neat.
All content provided by TB Ramsden & Co.